Creating a Batch Change
Learn in detail about how to create, view, and filter your Batch Changes.
Batch Changes are created by writing a batch spec and executing that batch spec with the Sourcegraph CLI src.
There are two ways of creating a batch change:
- On your Sourcegraph instance, with server-side execution
- On your local machine, with the Sourcegraph CLI
On your Sourcegraph instance
Here, you'll learn how to create and run a batch change via server-side execution.
To get started, click the Batch Changes icon in the top navigation or navigate to /batch-changes.
Create a batch change
Click the Create batch change button on the Batch Changes page, or go to /batch-changes/create.

You will be redirected to a page showing you a list of curated templates.
Choosing a template
From the template selection page, you can either:
- Pick a template from the list of curated templates that best matches your use case
- Click "Start from Scratch" if you prefer to continue without a template
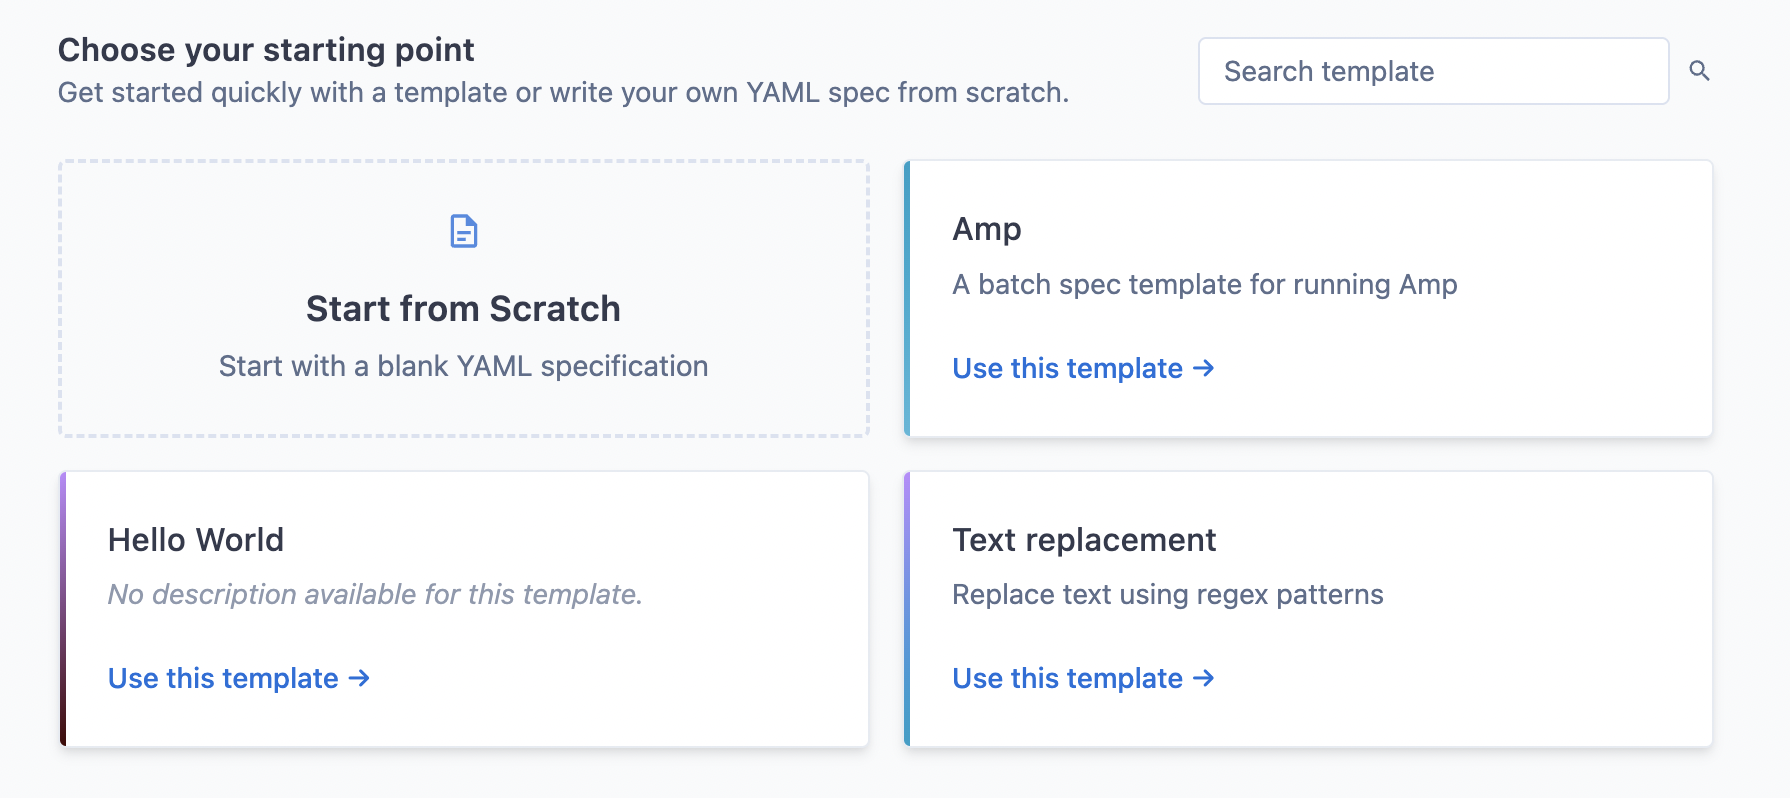
Your site admin can curate the list of available templates to match your organization's specific needs and use cases.
Filling out template fields
If you selected a template, you will need to fill out the form fields specific to that template. These fields will customize the batch spec to your specific requirements.
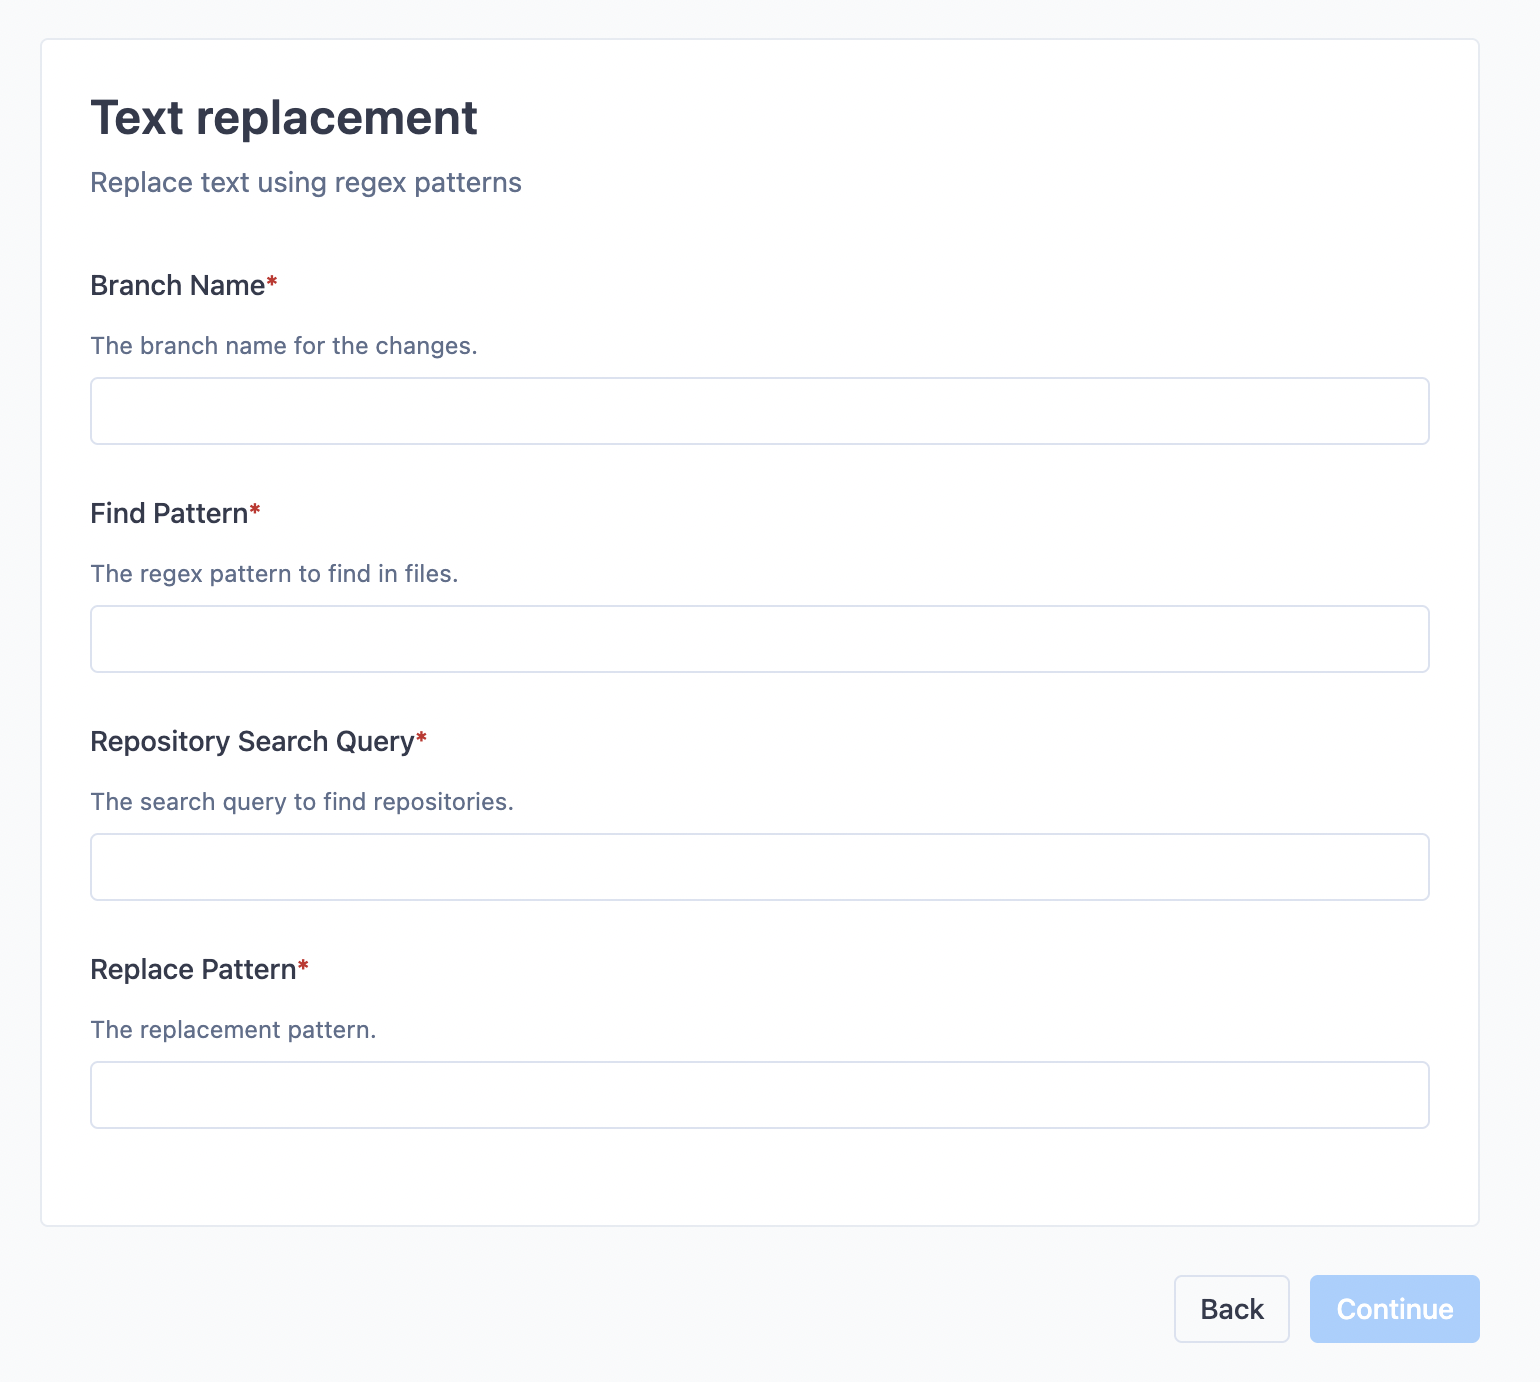
The form fields are validated by regular expressions. If the validation fails, look at the description of that field to see what kind of value is required.
Choose a name for your batch change
After you've filled out the template form fields, or after you've clicked "Start from Scratch", you will be prompted to choose a name for your namespace and optionally define a custom namespace to put your batch change in.
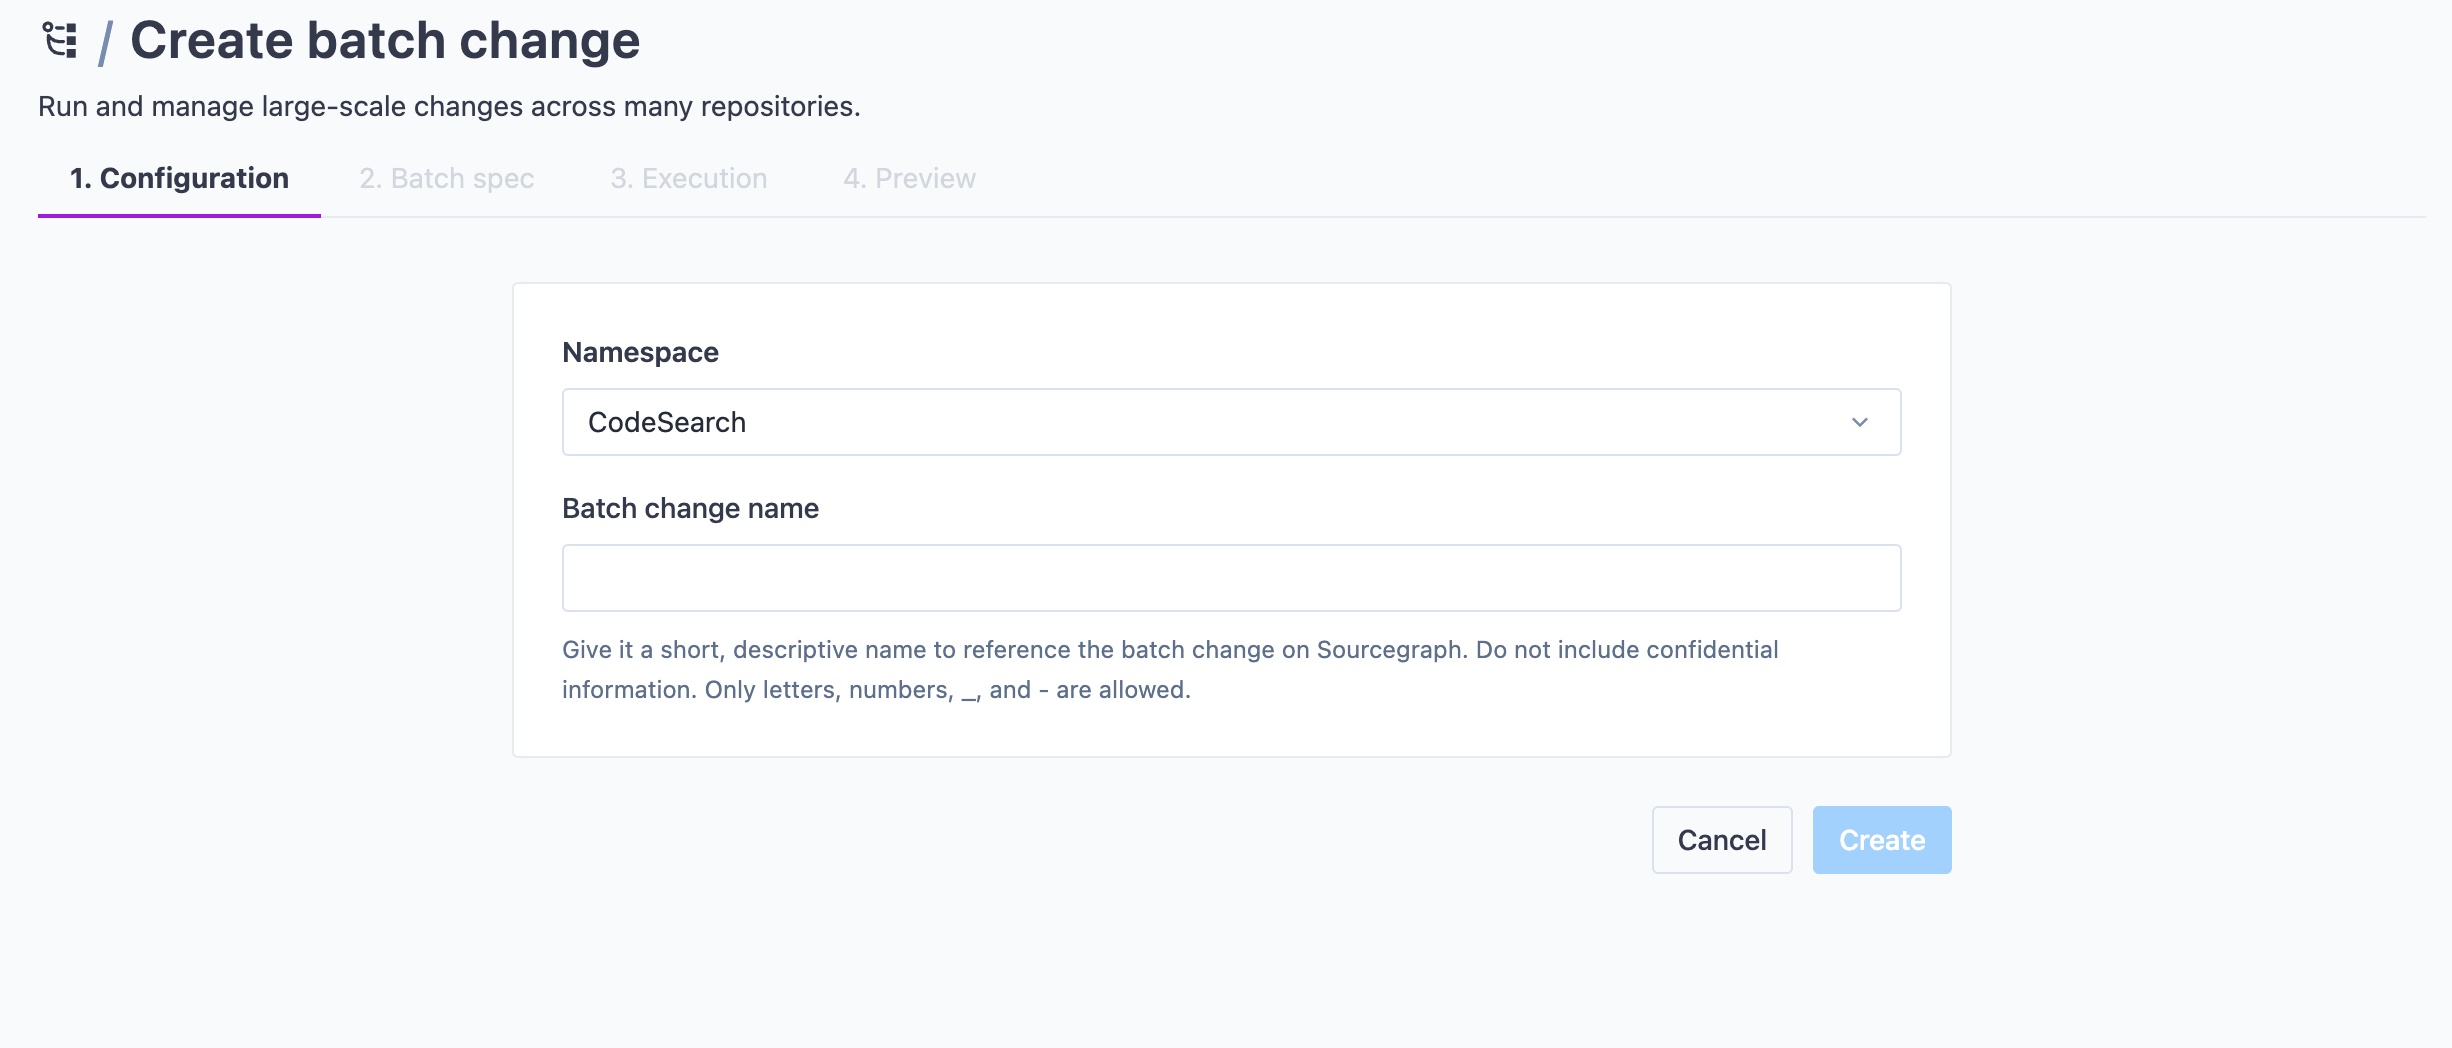
Once done, click Create.
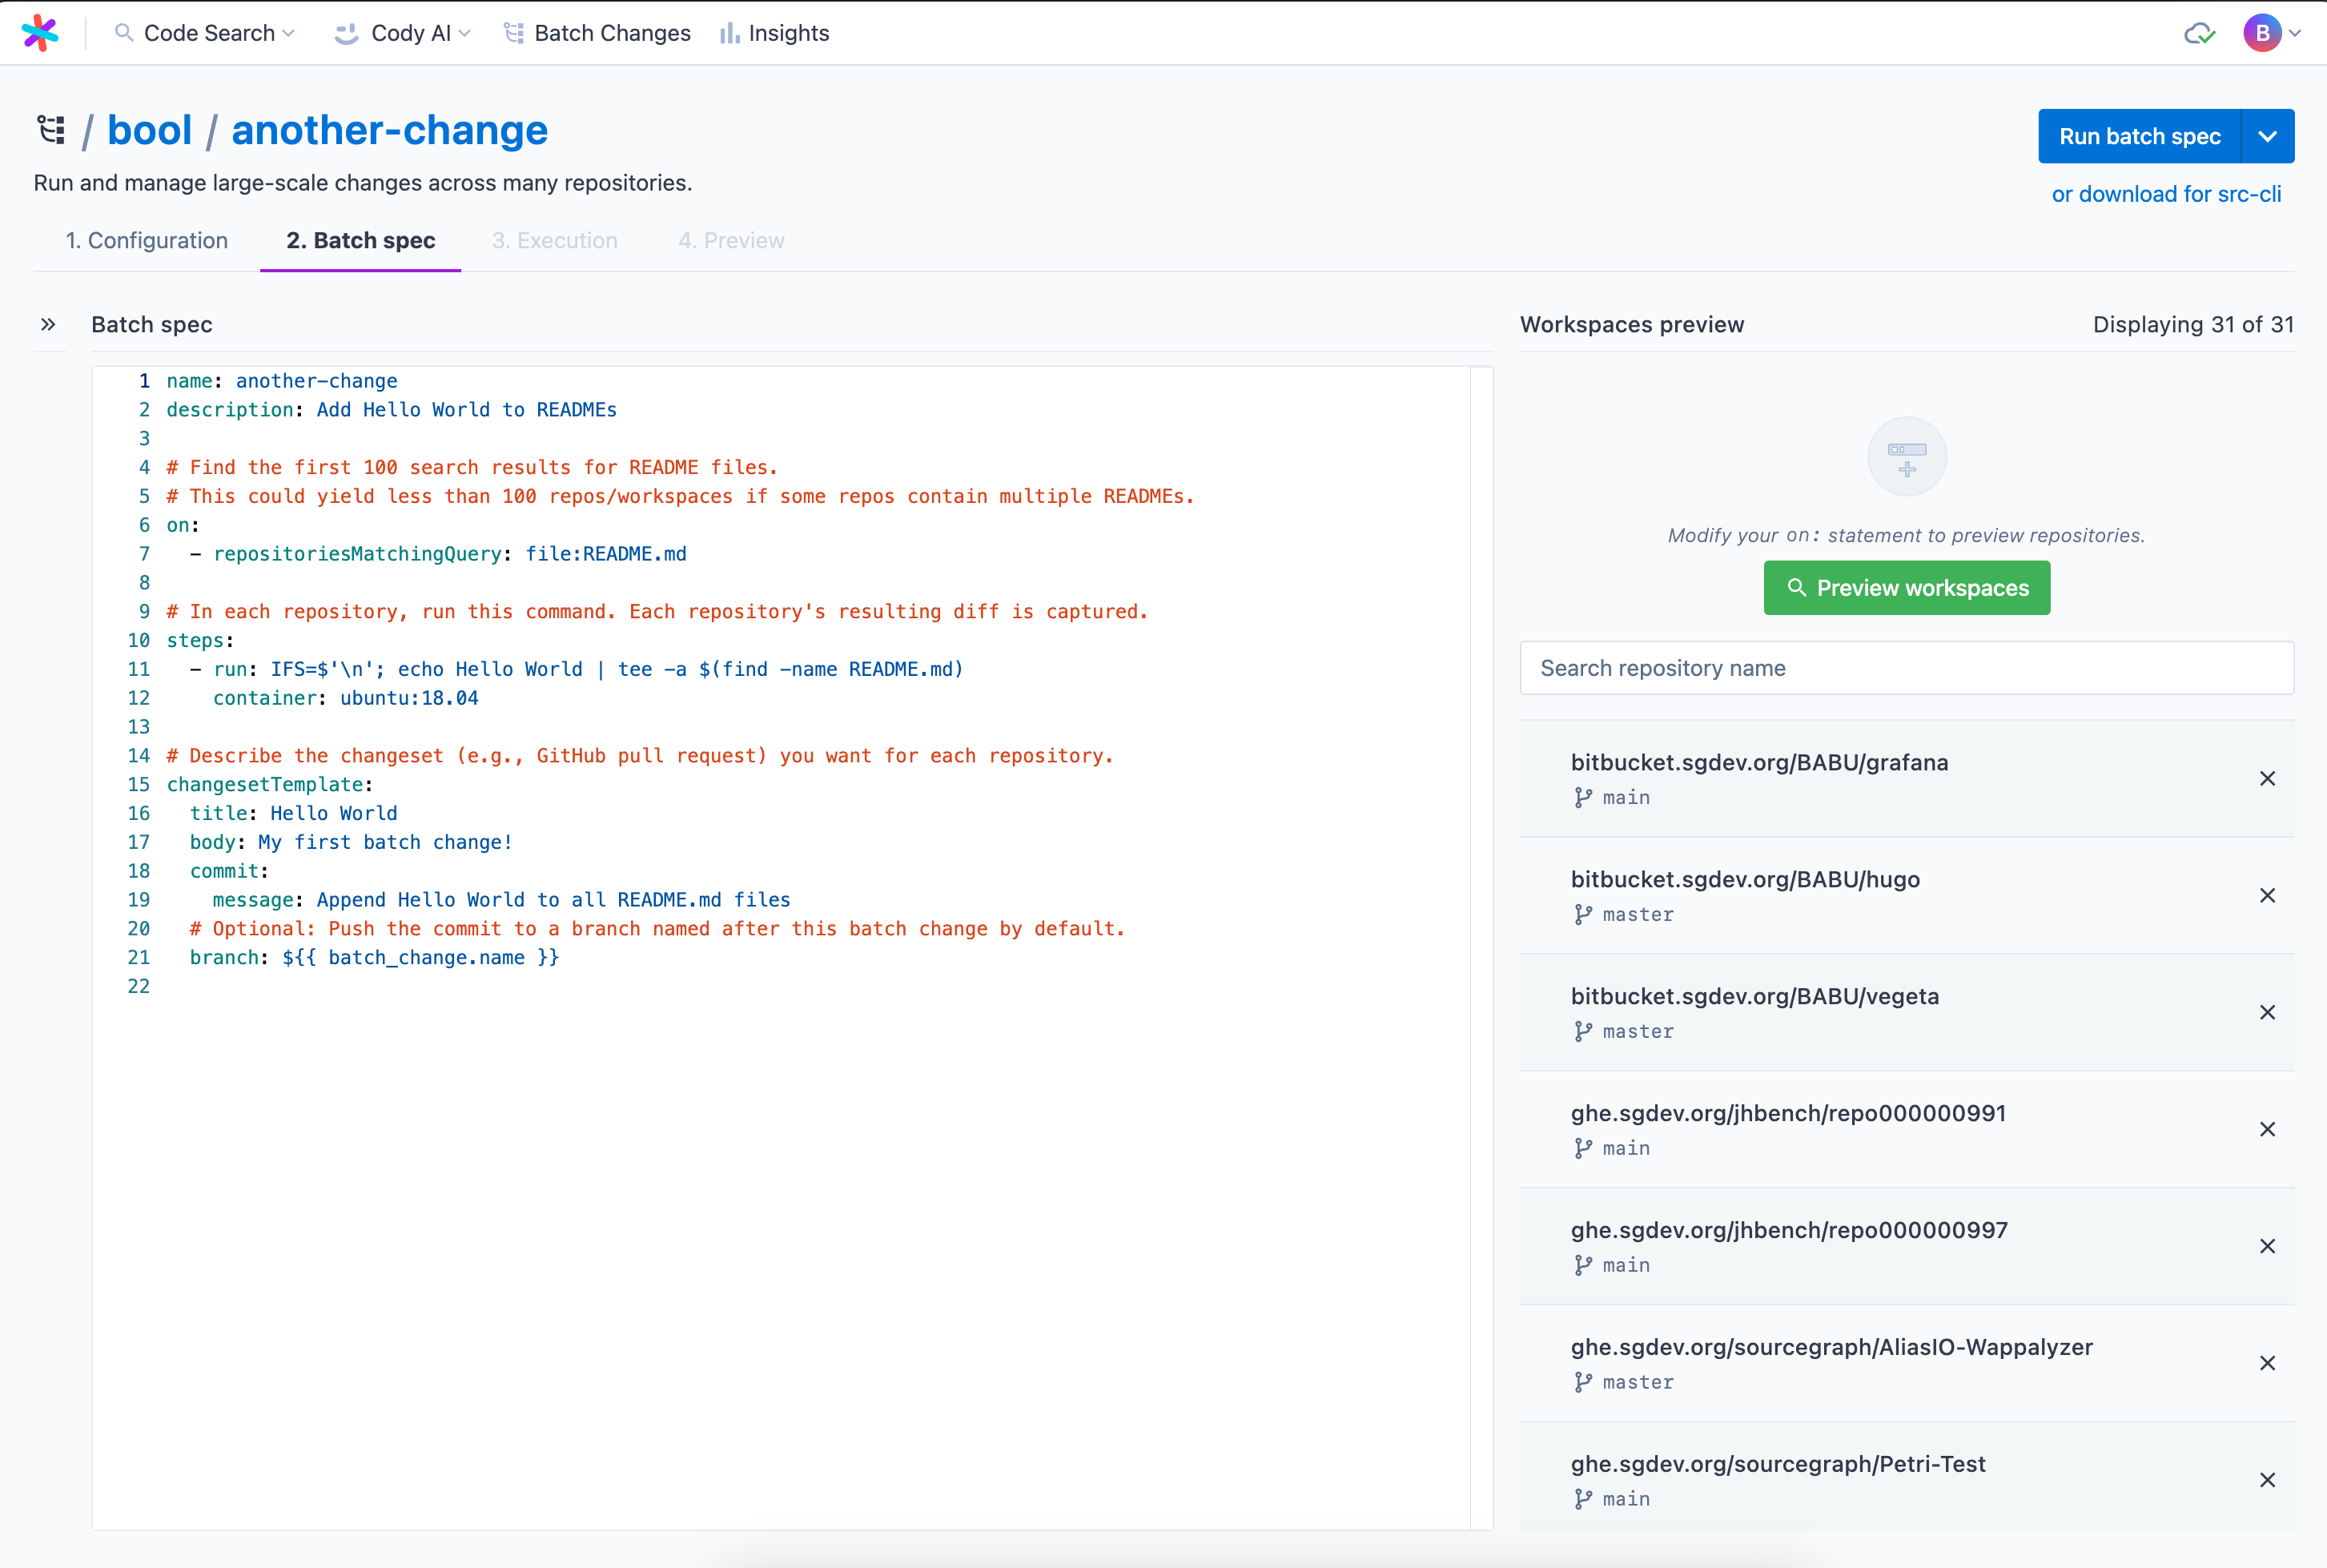
Previewing batch spec and workspaces
You can now see the batch spec and run a preview of the affected repositories and workspaces from the right-hand side panel. After resolution, it will show all the workspaces in repositories that match the given on statements. You can search through them and determine if your query is satisfying before starting execution. You can also exclude single workspaces from this list.
Batch Changes can also be used on multiple projects within a monorepo by using the workspaces key in your batch spec.
The library contains examples that you can apply right into your batch spec if you need inspiration. Your site admin can manage the library of examples.
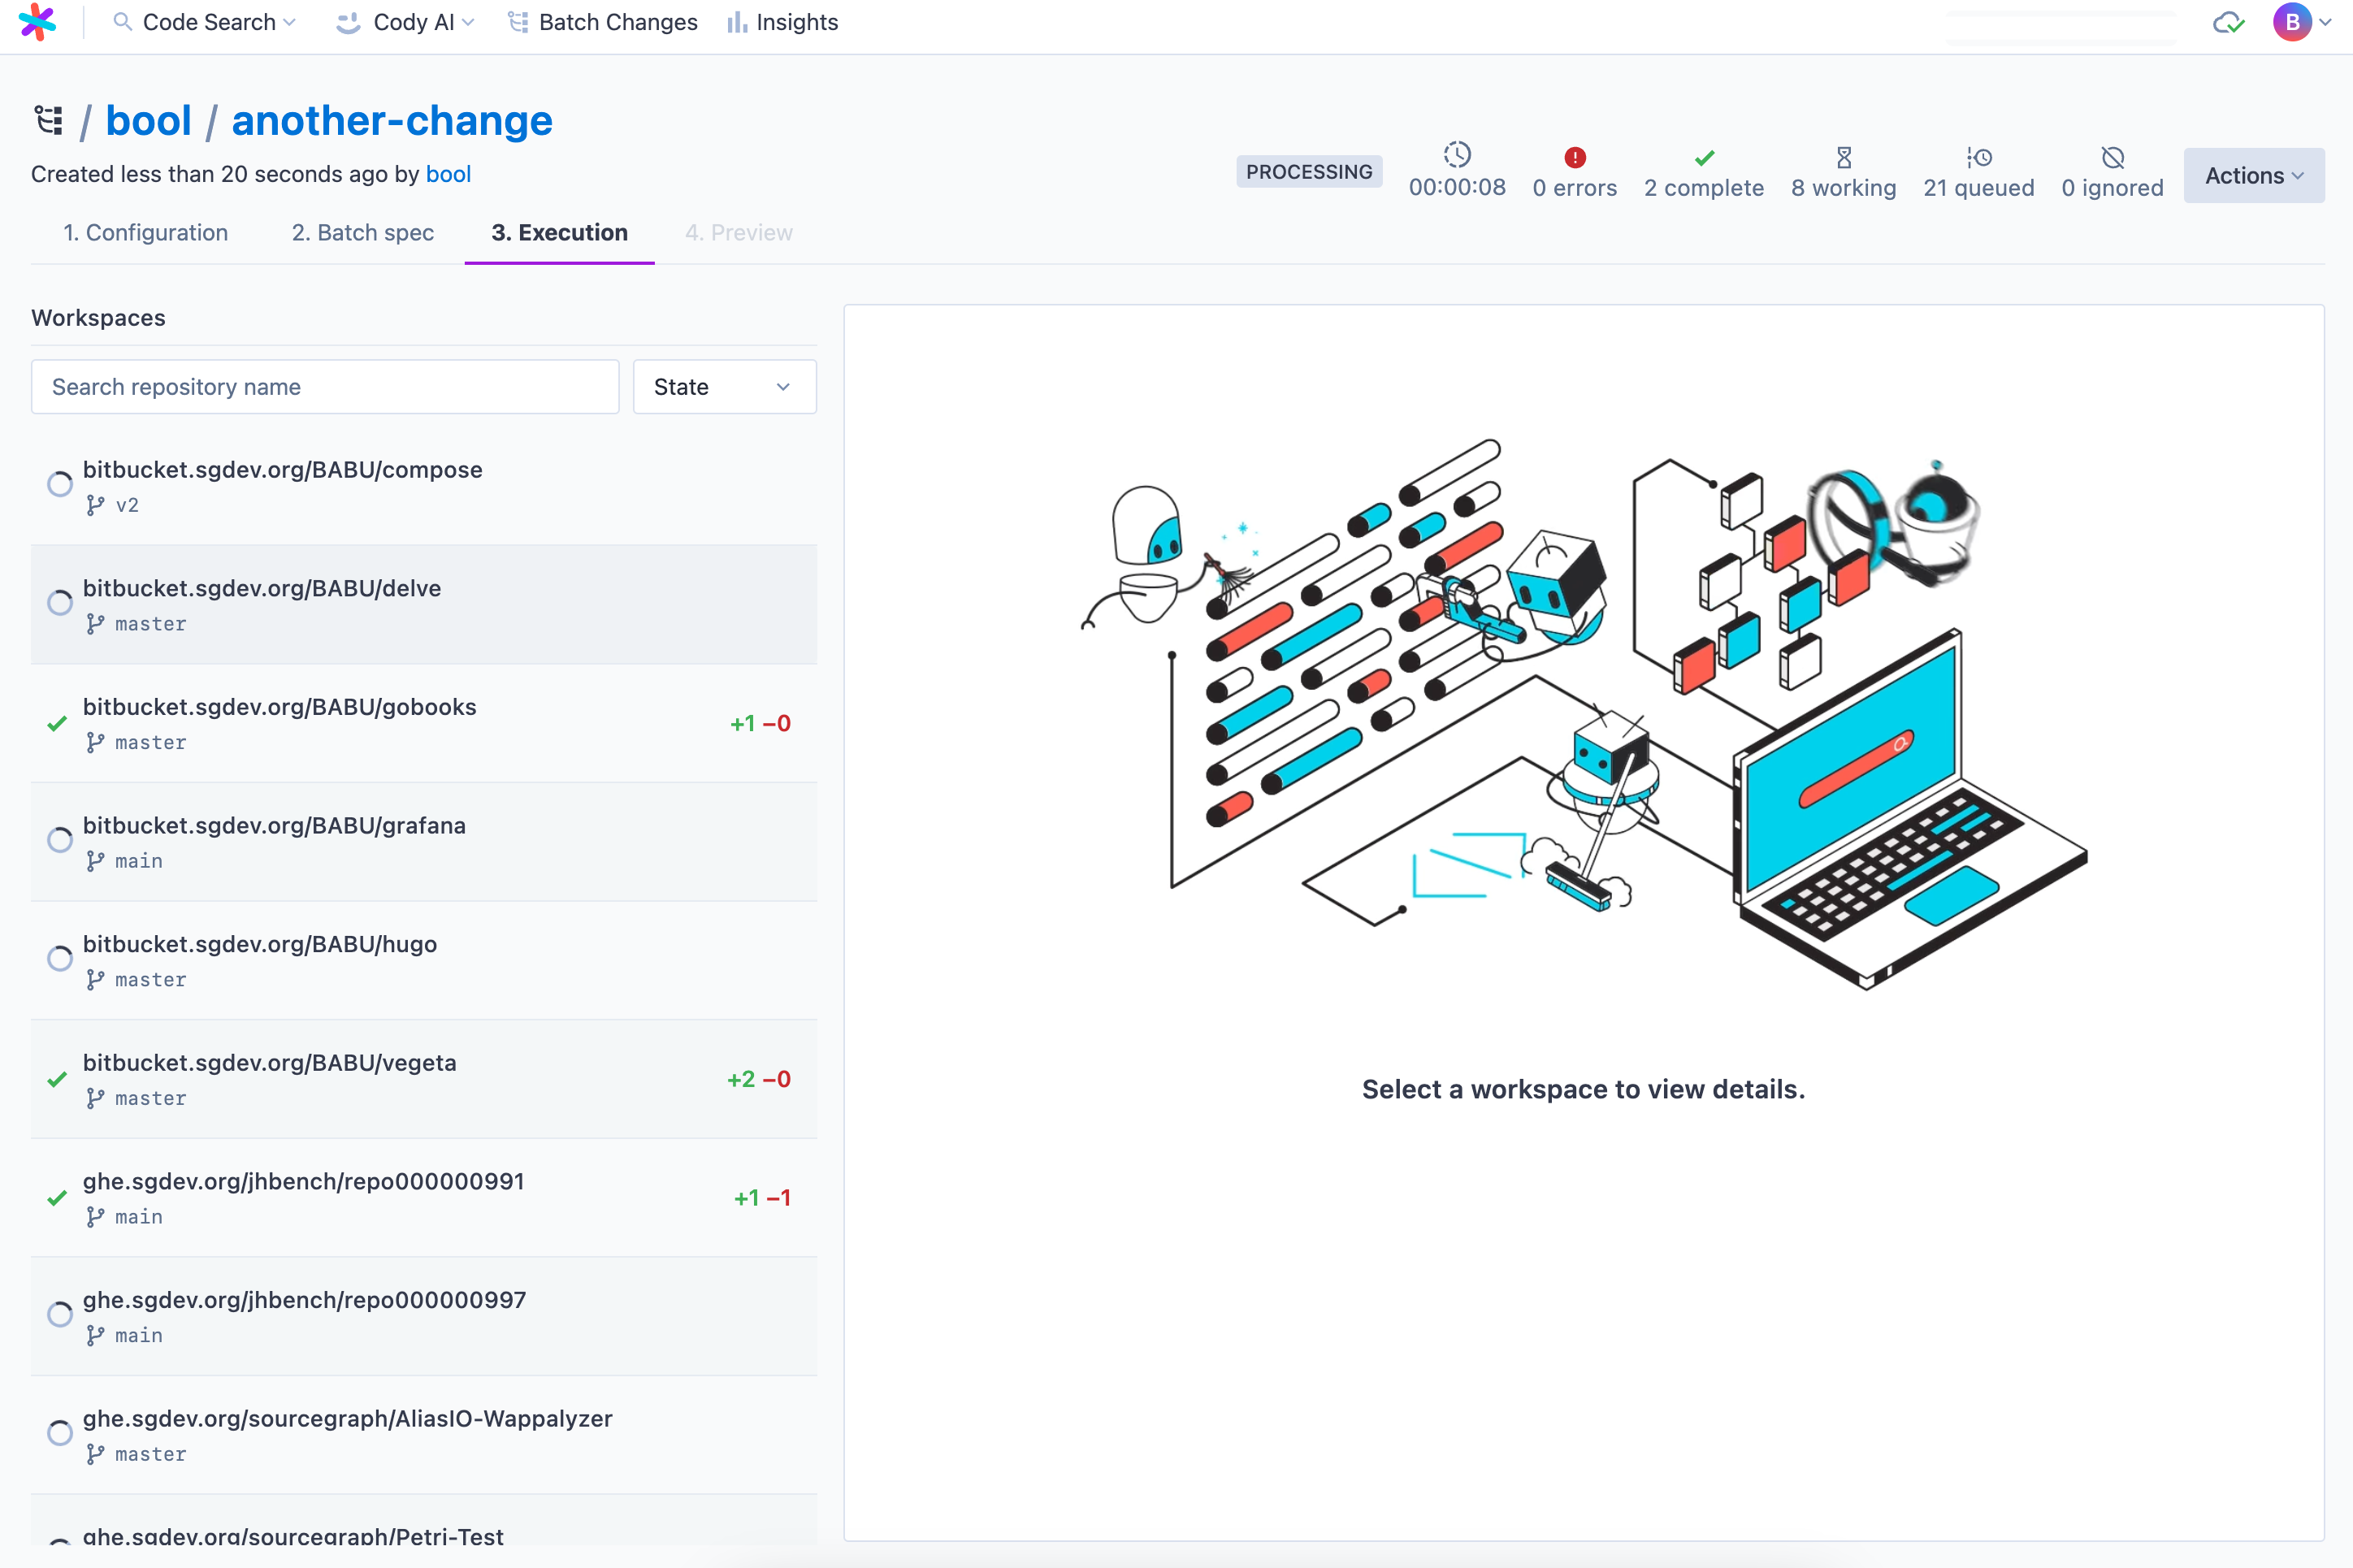
Executing your batch spec
When the spec is ready to run, ensure the preview is up to date and then click Run batch spec. This takes you to the execution screen. On this page, you see:
- Run statistics at the top
- All the workspaces, including status and diff stat, in the left panel
- Details on a particular workspace on the right-hand side panel where you can see steps with:
- Logs
- Results
- Command
- Per-step diffs
- Output variables
- Execution timelines for debugging
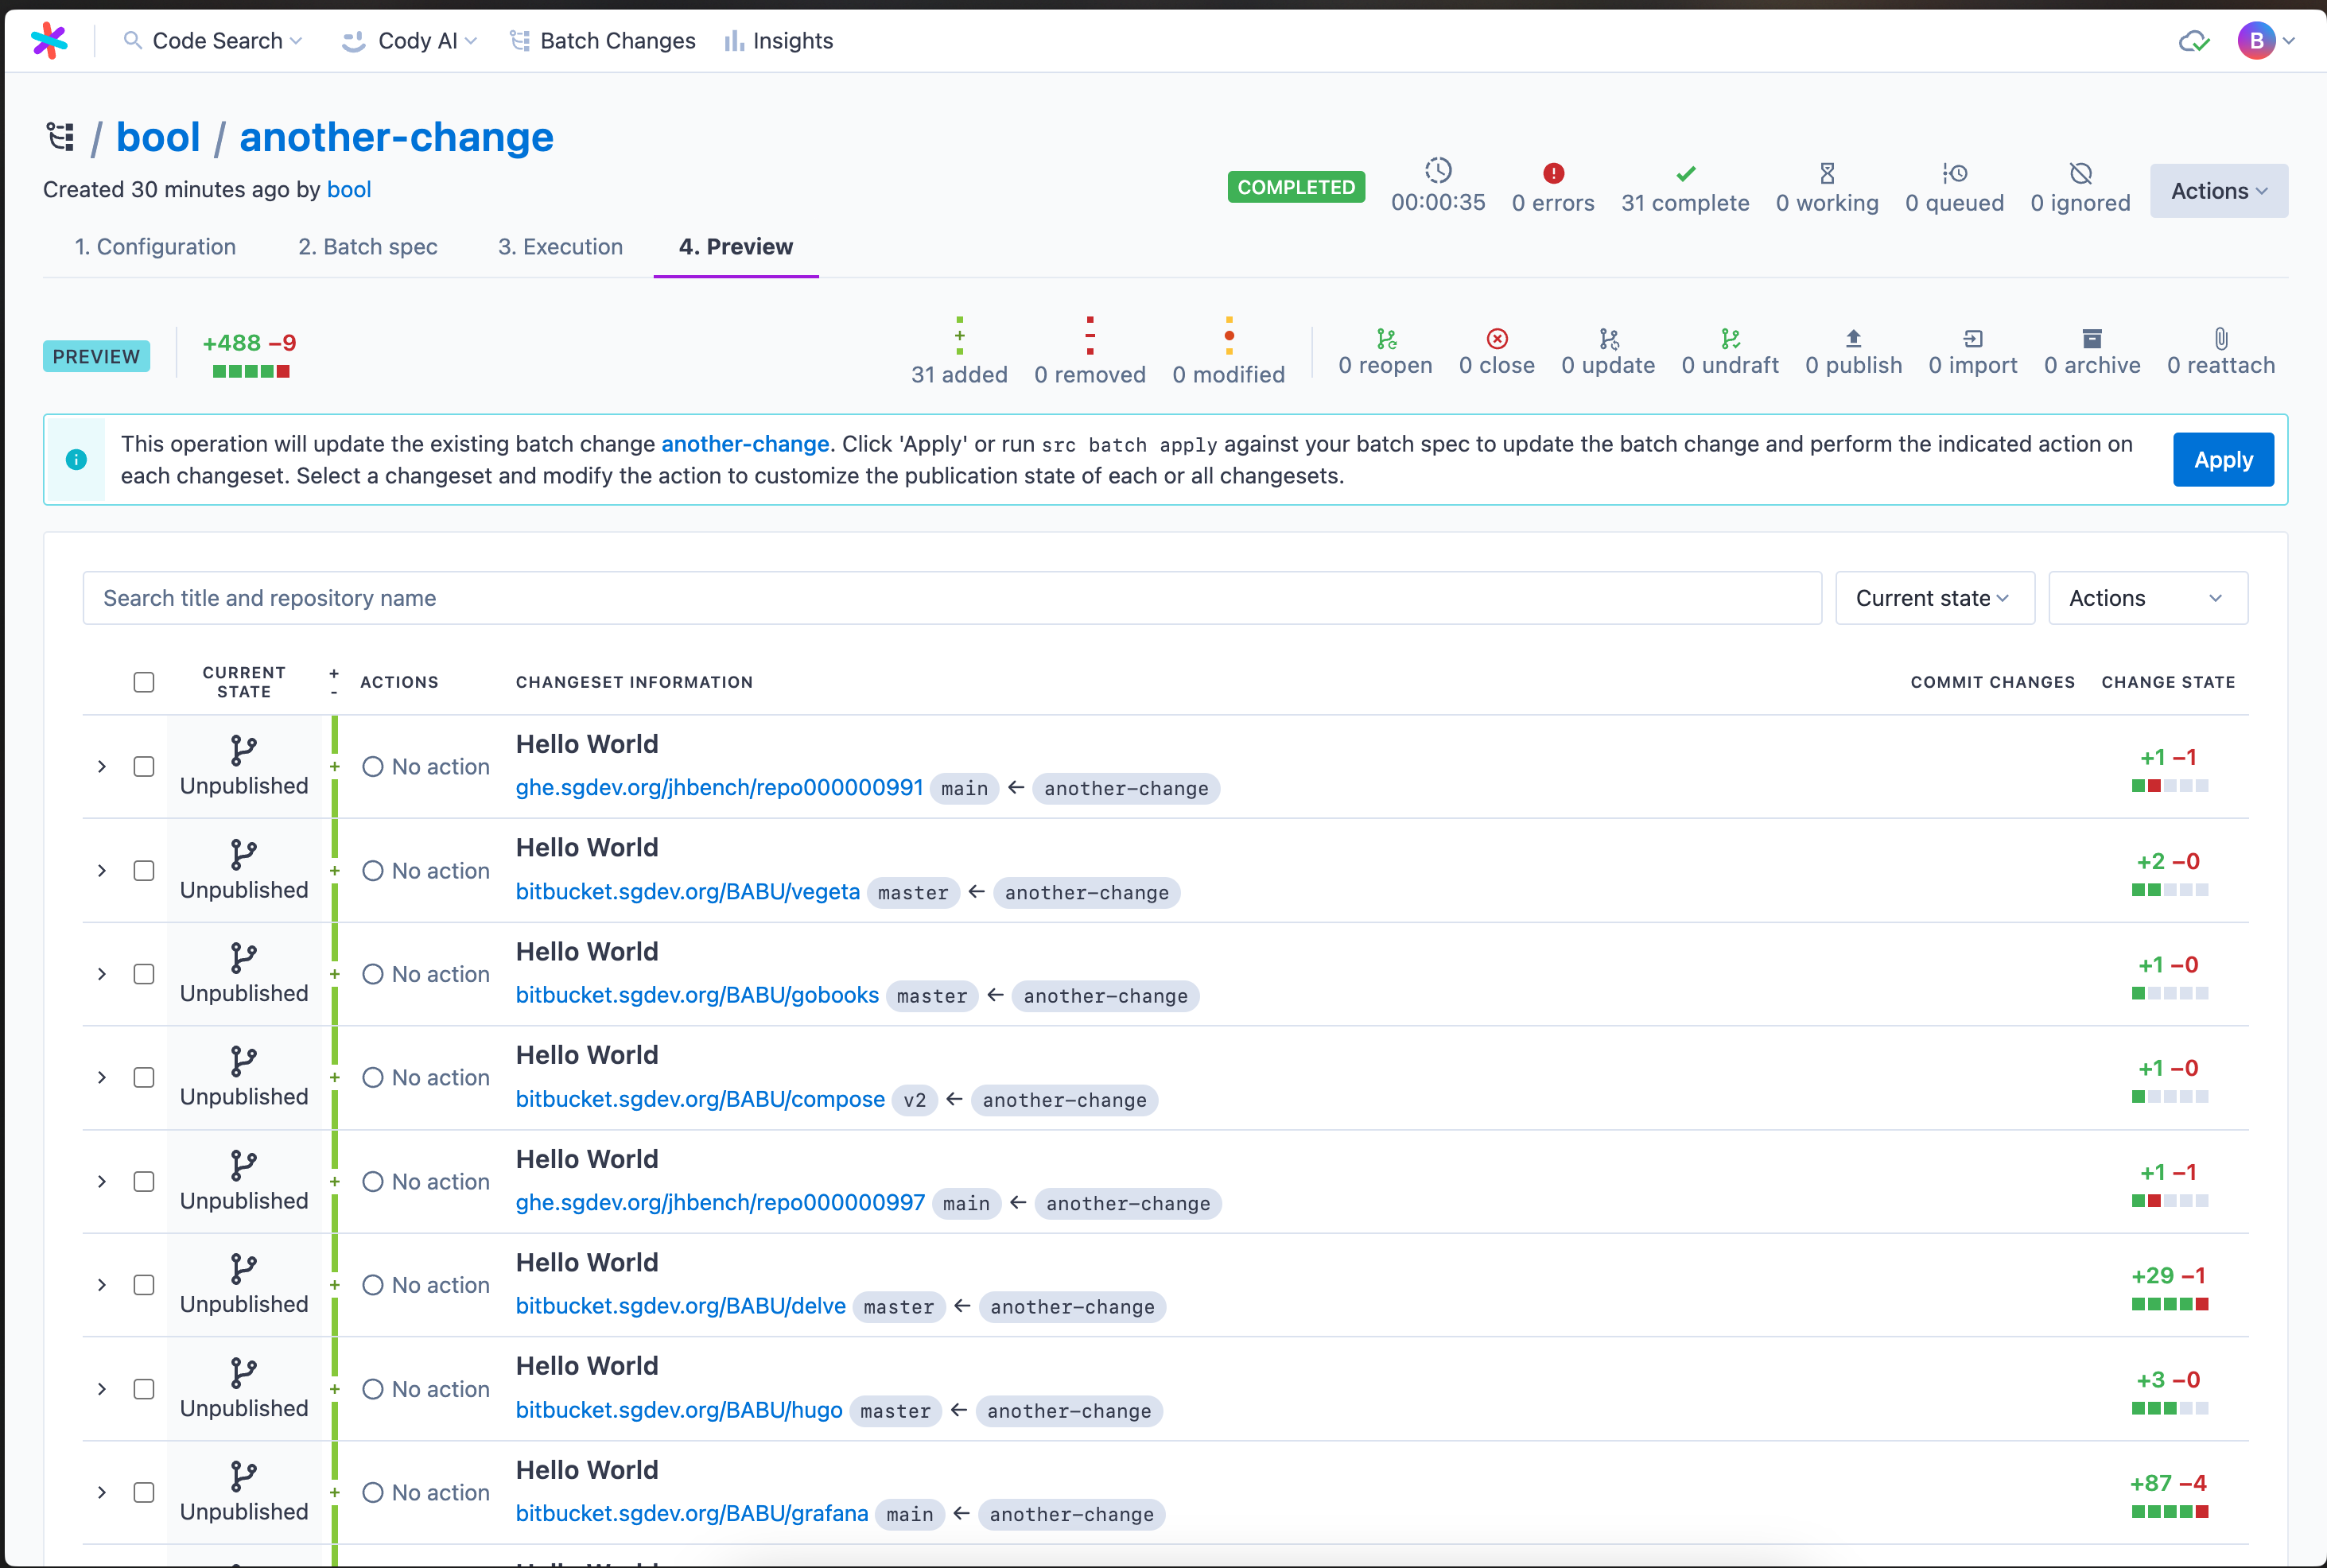
Once finished, you can proceed to the batch spec preview, as you know it from before.
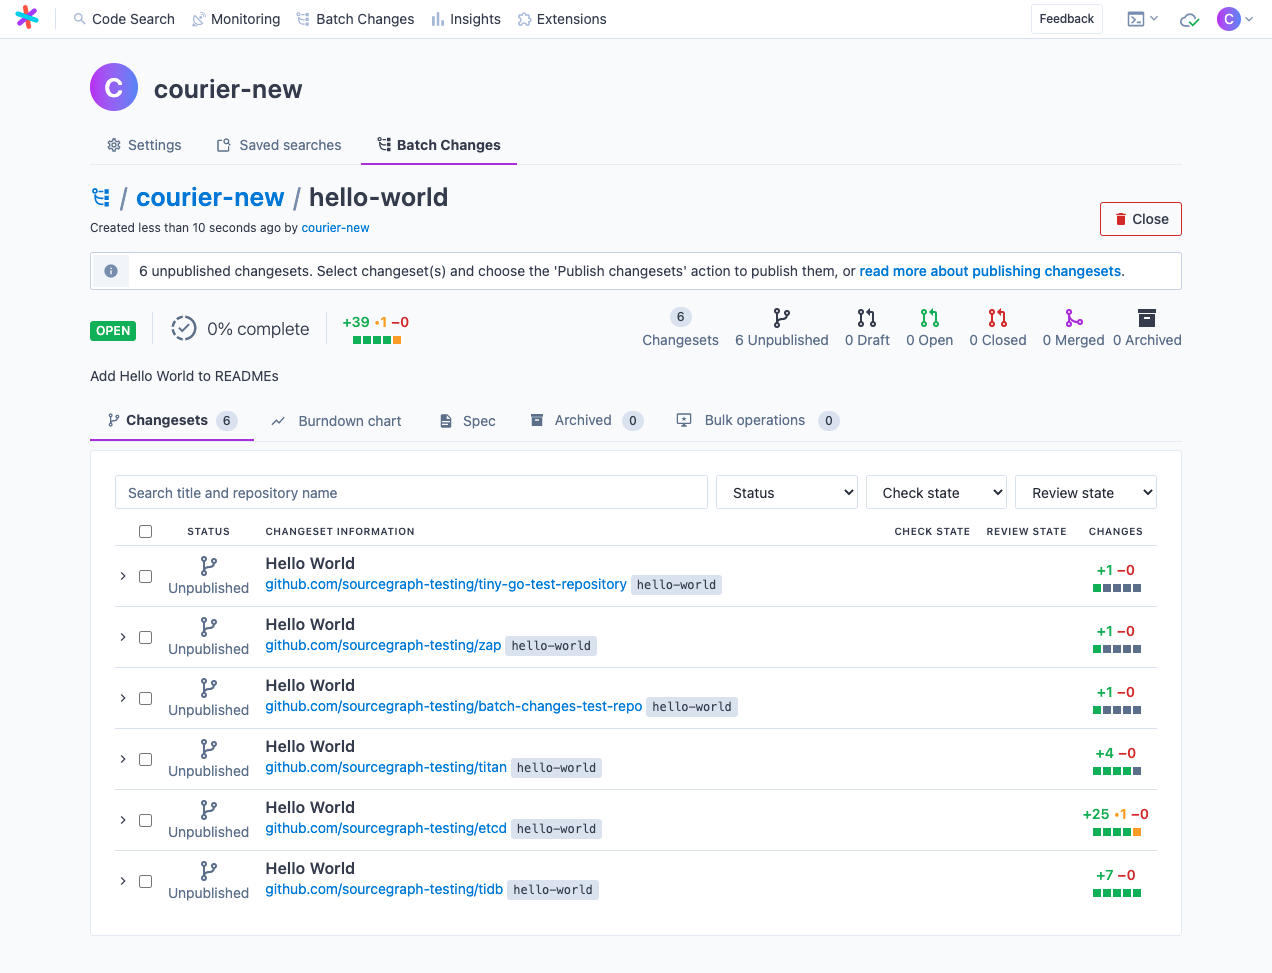
Previewing and applying the batch spec
On this page, you can review the proposed changes. Once satisfied, click Apply.
Congratulations, you ran your first batch change server-side 🎊
Using the Sourcegraph CLI
This part of the guide will walk you through creating a batch change on your local machine with the Sourcegraph CLI.
Requirements
- Sourcegraph instance with repositories in it. See the Quickstart guide on how to set up a Sourcegraph instance
- Installed and configured Sourcegraph CLI. Read about the detailed process in the quickstart guide
- Configure the credentials for the code host(s) on which you'll create changesets. Read more about Configuring user credentials docs on how to add and manage credentials
Writing a batch spec
To create a batch change, you need a batch spec describing the change. Here is an example batch spec that describes a batch change to add Hello World to all README files:
YAMLversion: 2
name: hello-world
description: Add Hello World to READMEs

# Find all repositories that contain a README file.
on:
 - repositoriesMatchingQuery: file:README

# In each repository, run this command. Each repository's resulting diff is captured.
steps:
 - run: IFS=$'\n'; echo Hello World | tee -a $(find -name README)
 container: alpine:3

# Describe the changeset (e.g., GitHub pull request) you want for each repository.
changesetTemplate:
 title: Hello World
 body: My first batch change!
 branch: hello-world # Push the commit to this branch.
 commit:
  message: Append Hello World to all README files
 published: false # Do not publish any changes to the code hosts yet
The commits created from your spec will use the git config values for user.name and user.email from your local environment or [email protected] if no user is set. Alternatively, you can also specify an author in this spec.
See the batch spec YAML reference for more details on how to write batch specs.
Creating a batch change after previewing
After writing a batch spec, you use the Sourcegraph CLI (src) to execute the batch spec and upload it to Sourcegraph, where you can preview the changes and apply the batch spec to create a batch change:
- Run the following command in your terminal:
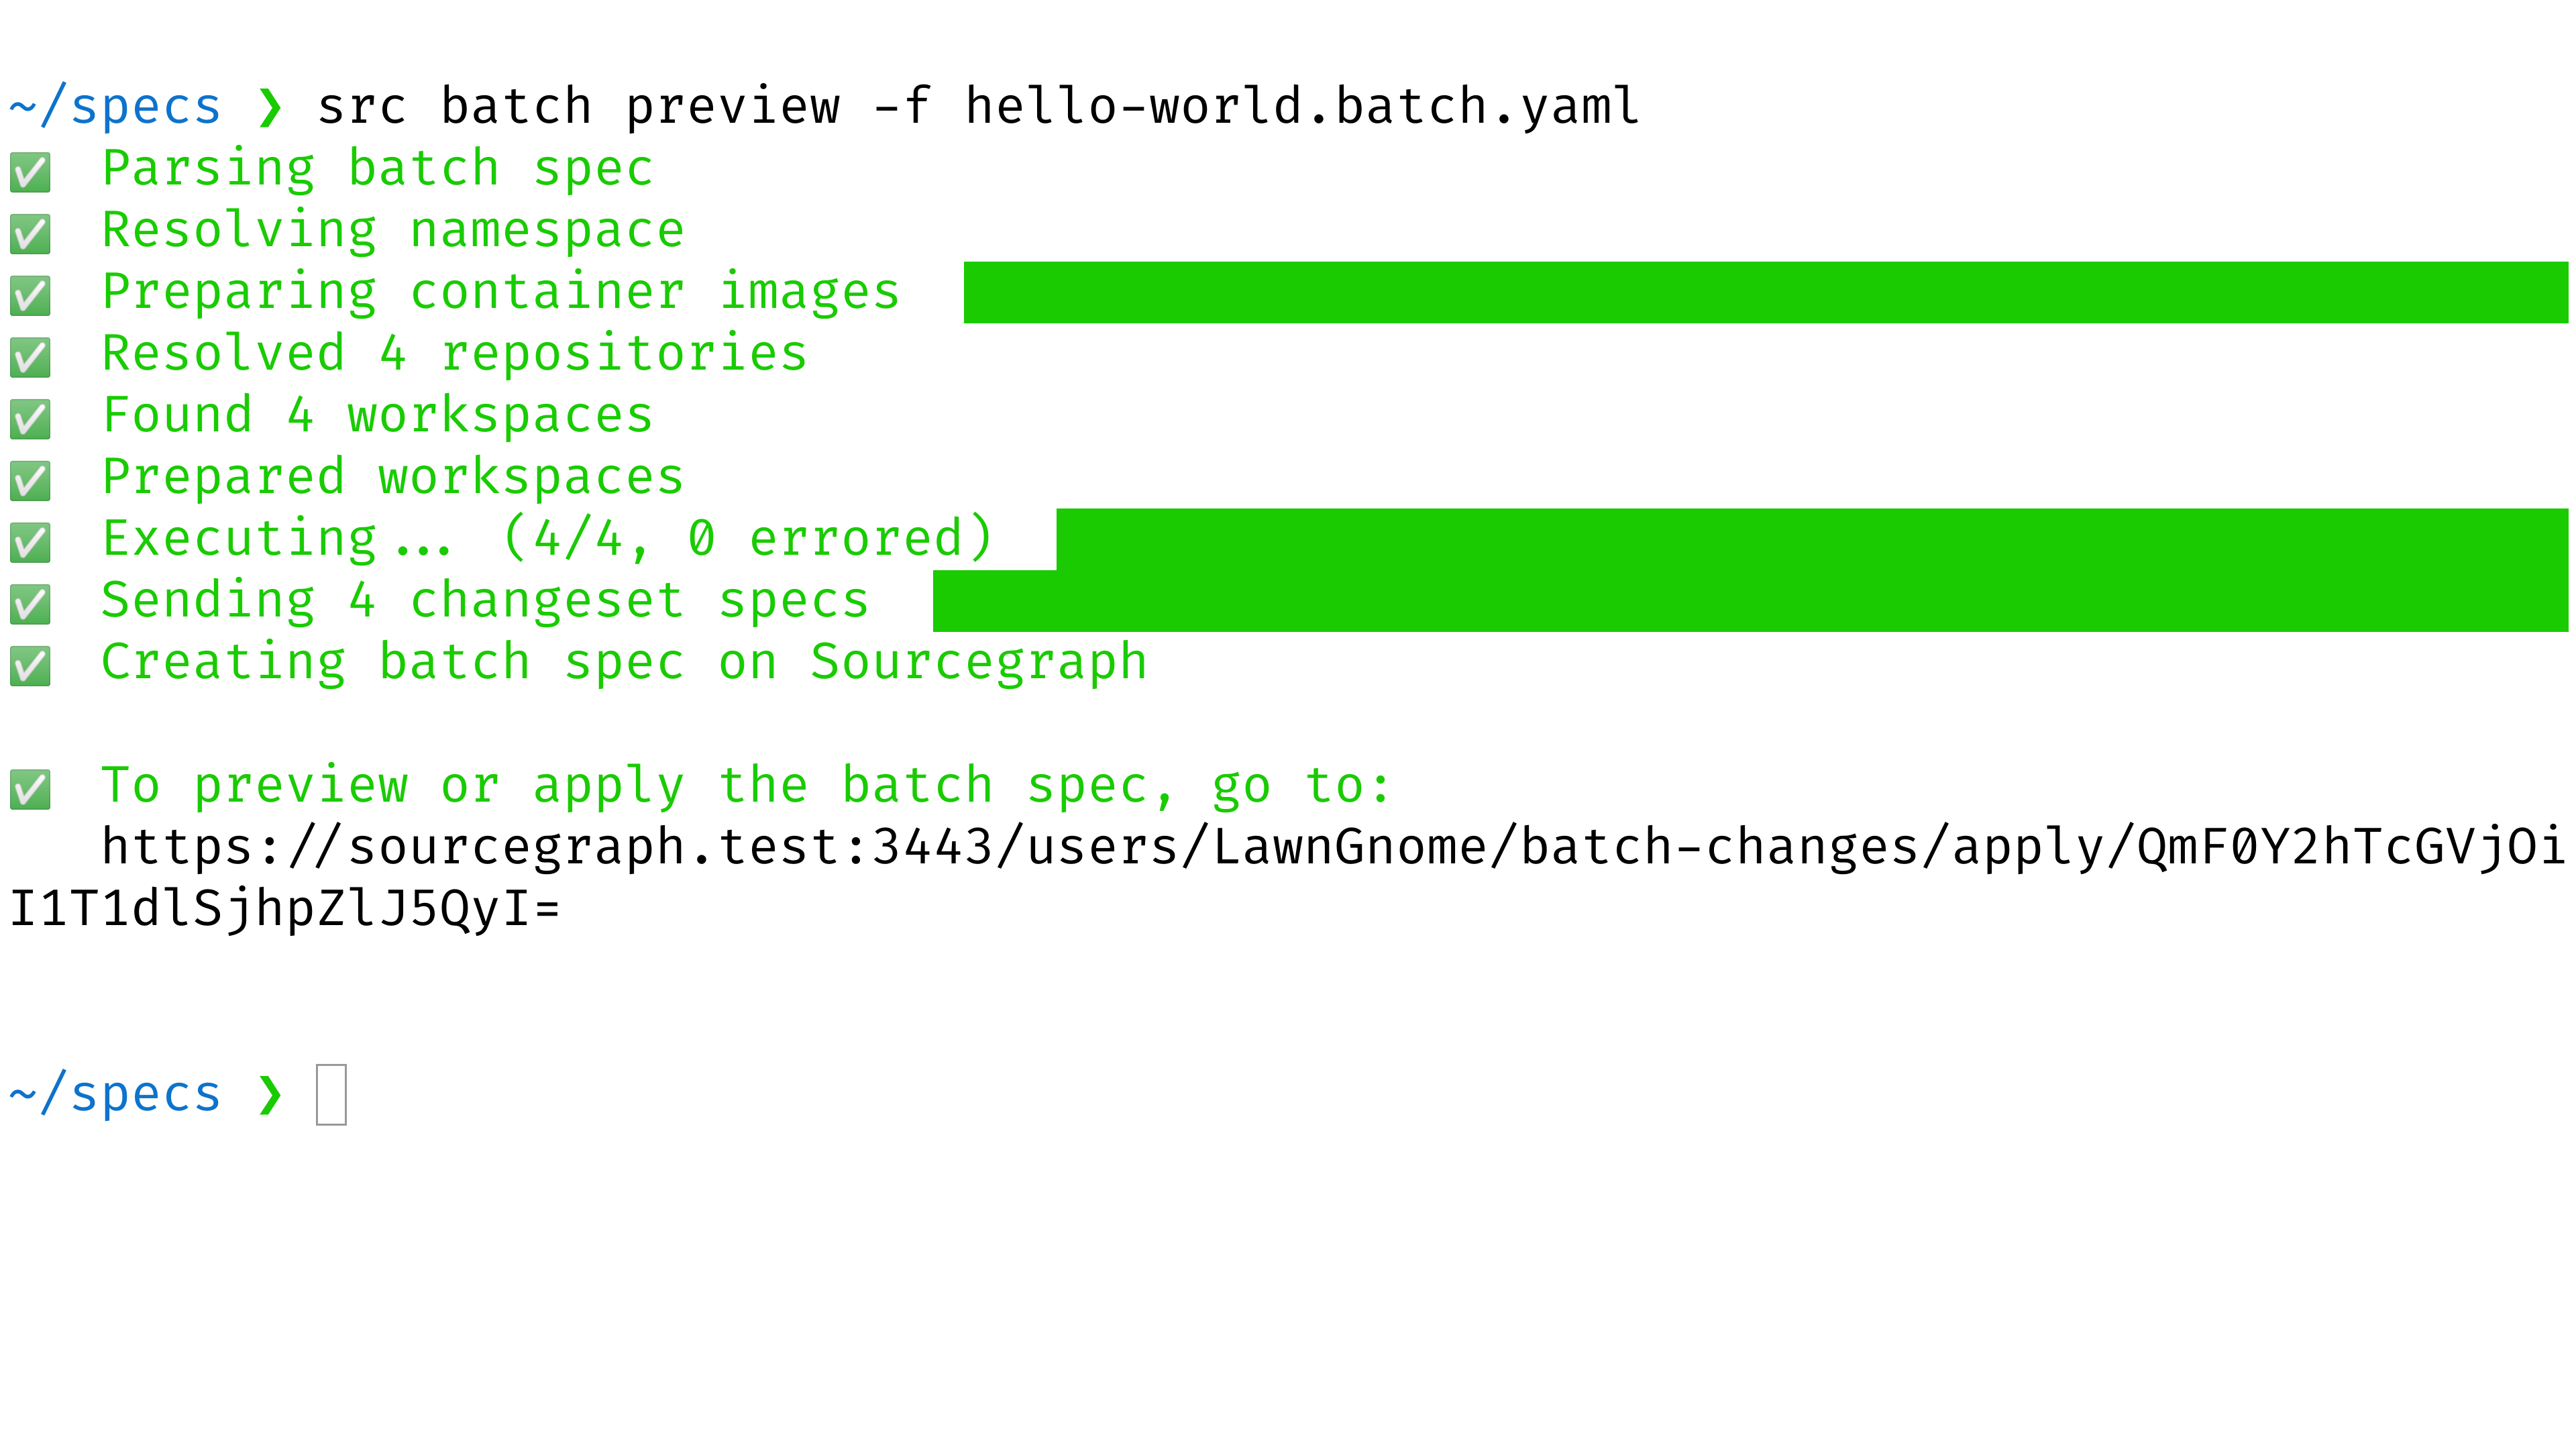
SHELLsrc batch preview -f YOUR_BATCH_SPEC.yaml
- Before any branches are pushed or changesets (e.g., GitHub pull requests) are created, you will see a preview of all changes and can confirm each one before proceeding.
Batch Changes's default behavior is to stop if computing changes in a
repository errors. You can choose to ignore errors instead by adding the
skip-errors flag : src batch preview -f spec.batch.yml -skip-errors.
- Wait for it to run and compute the changes for each repository (using the repositories and commands in the batch spec).
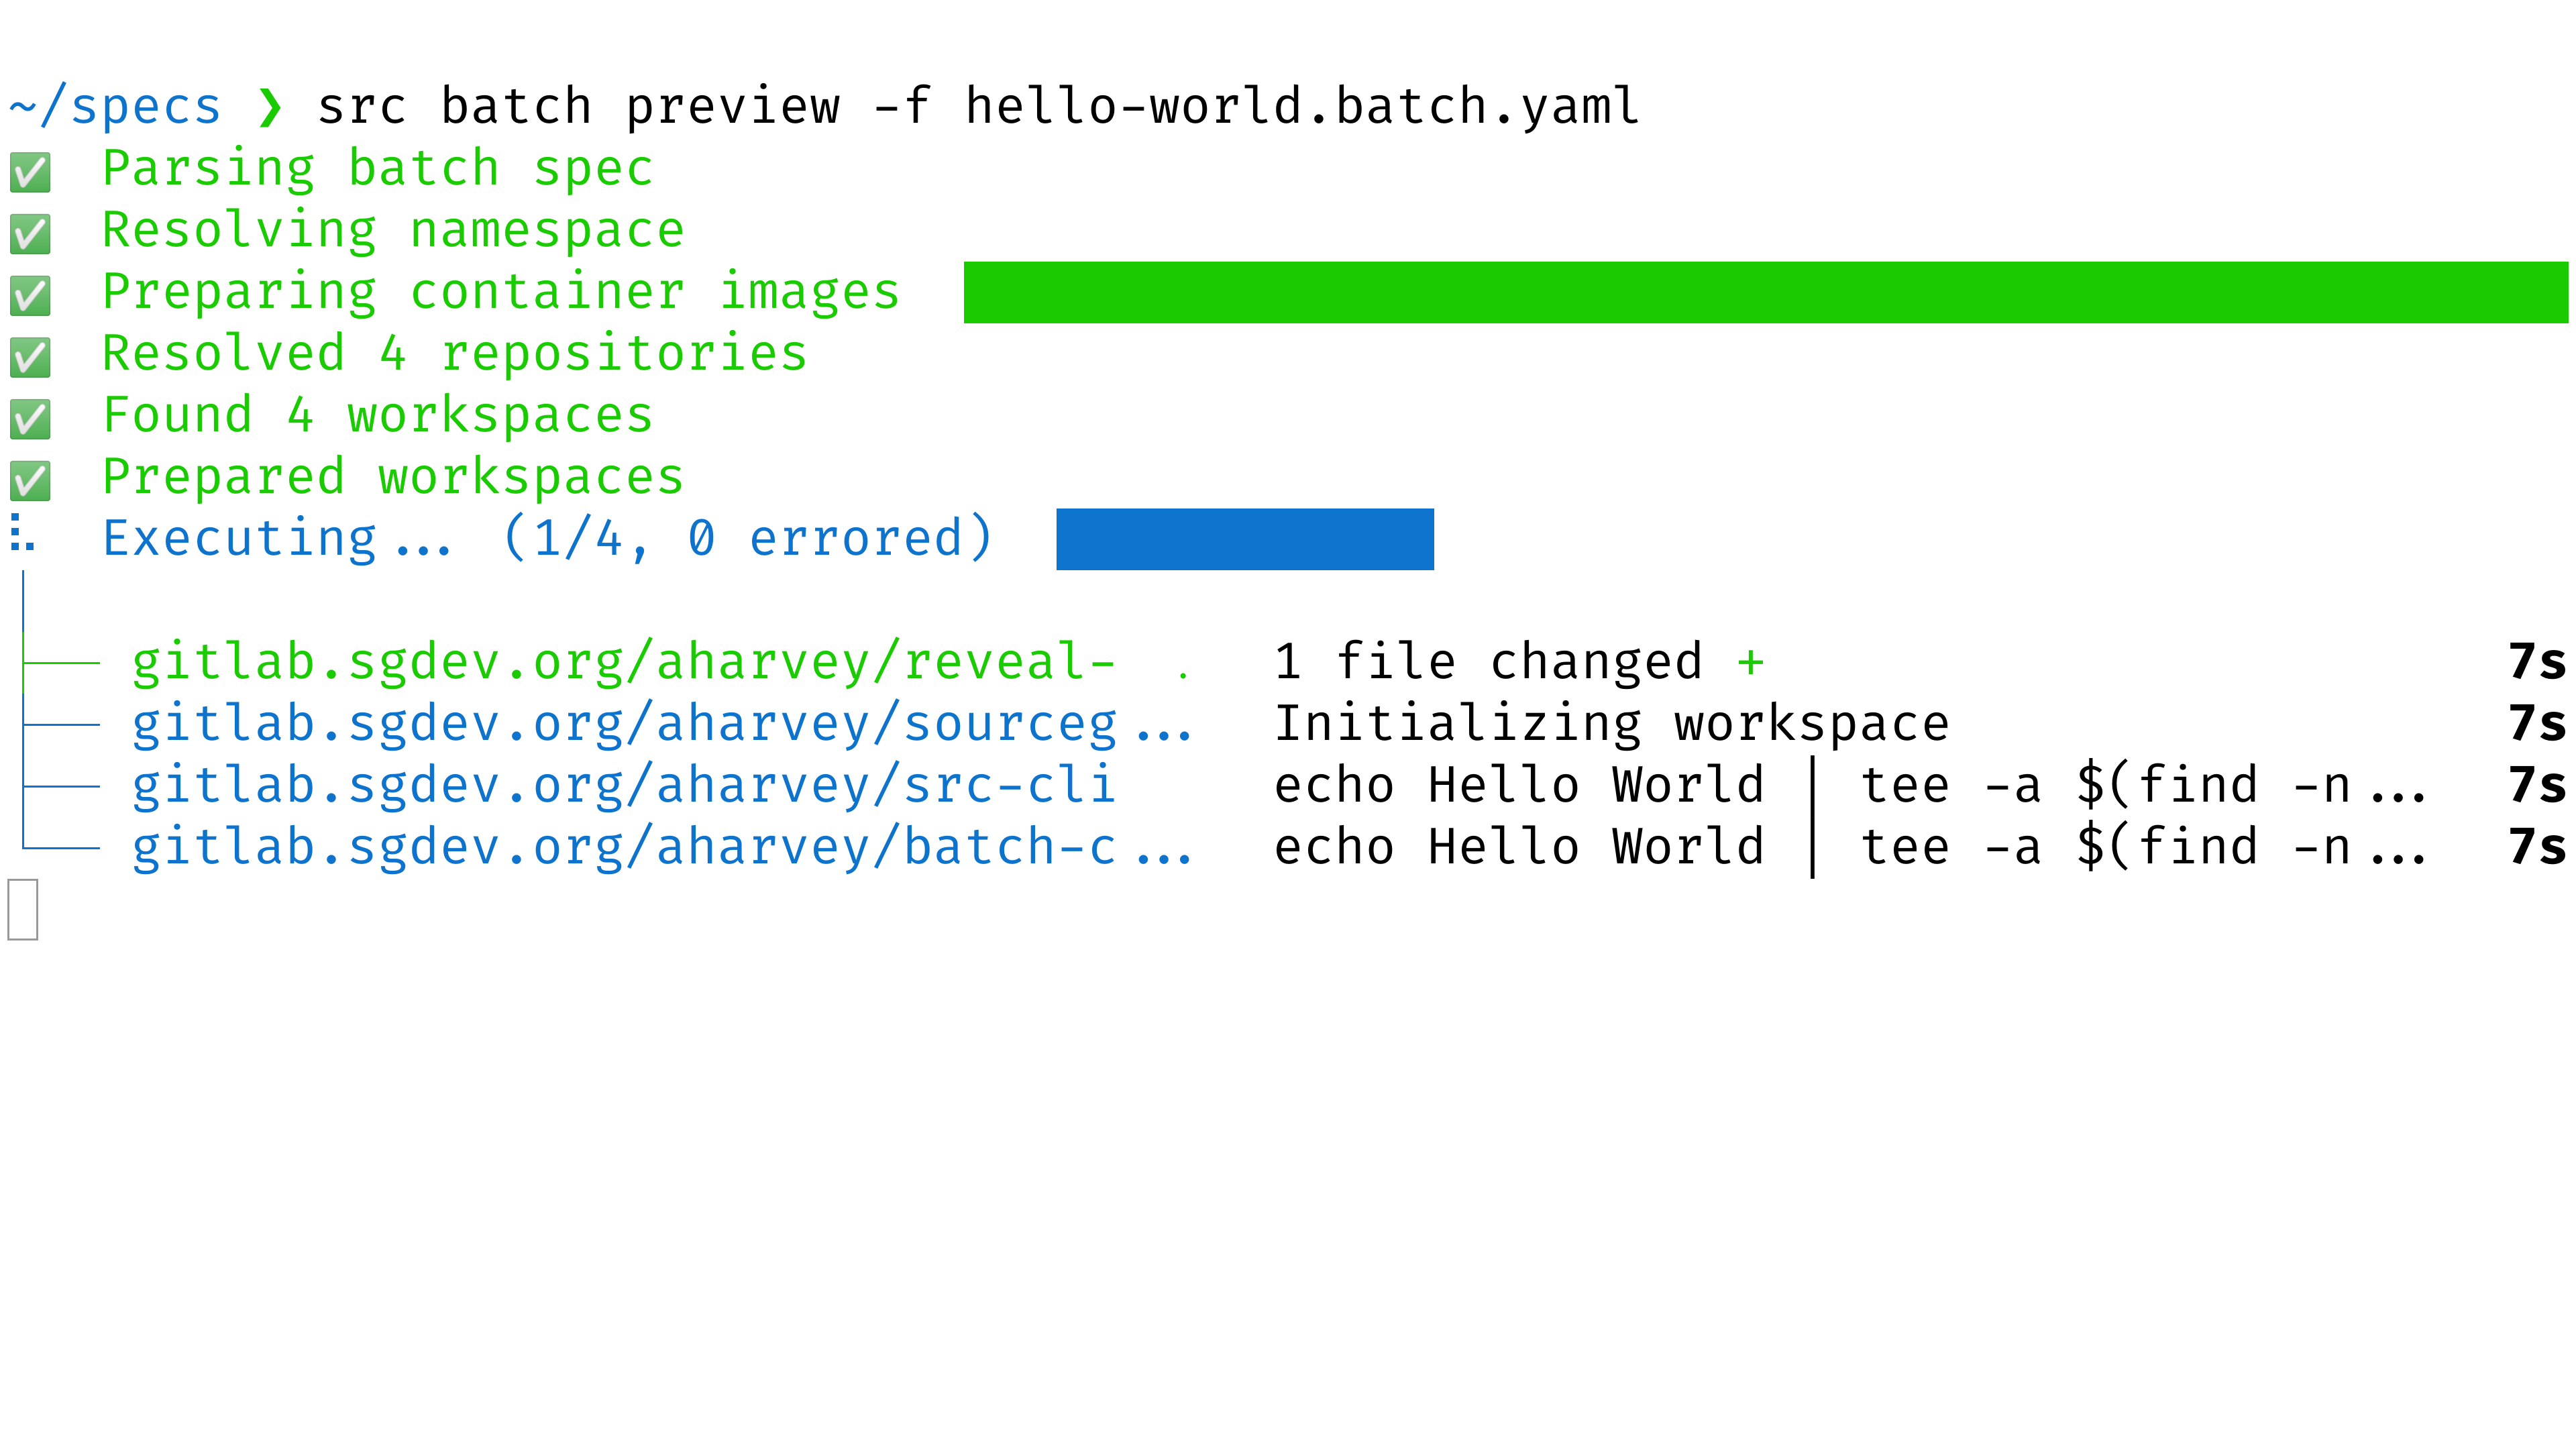
- Open the preview URL where the command is printed out.
- Examine the preview. This is the result of executing the batch spec. Confirm that the changes are what you intended. If not, edit the batch spec and then rerun the command above.
- Click the Apply button to create the batch change.
After you've applied a batch spec, you can publish changesets to the code host when you're ready. This will turn the patches into commits, branches, and changesets (such as GitHub pull requests) for others to review and merge.
You can share the link to your batch change with other users if you want their help. Any user on your Sourcegraph instance can view it in the batch changes list.
If a user viewing the batch change lacks read access to a repository in the batch change, they can only see limited information about the changes to that repository (and not the repository name, file paths, or diff).
You can update a batch change's changes at any time, even after you've published changesets. For more information, see Updating a batch change.
Applying a batch spec without a preview
You can use Sourcegraph CLI (src) to directly apply a batch spec to create or update a batch change without having to use the UI.
Instead of running src batch preview you run the following:
BASHsrc batch apply -f YOUR_BATCH_SPEC.yaml
This command won't print a link to a preview. It will create or update the batch change it describes directly.
That can be useful if you want to update a single field in the batch spec, i.e., the description or the changesetTemplate.body, or if you're going to continuously update a batch change by running src in a CI workflow.
Creating a batch change in a different namespace
Batch Changes are uniquely identified by their name and namespace. The namespace can be any Sourcegraph username or the name of a Sourcegraph organization.
By default, Batch Changes will use your username on Sourcegraph as your namespace. To create Batch Changes in a different namespace, use the -namespace flag when previewing or applying a batch spec:
BASHsrc batch preview -f your_batch_spec.yaml -namespace <SOURCEGRAPH_USERNAME_OR_ORG>
When creating a batch change server-side using the UI, you can select the namespace to which the batch change belongs when you create it.